Lesson 6.3: Programming & Rehearsing Timecoded Lighting Tracks
Warning
⚠️ Draft Lesson: This lesson is currently a working draft and is undergoing practical review. Technical labs, workflows, and diagrams may be expanded and refined in upcoming revisions.
In live entertainment production, there is no feeling quite like watching a perfectly executed timecoded lighting track: forty moving heads trace an elegant Lissajous curve through the breakdown, blinders punch on every snare hit, and the entire rig erupts into an audio-visual explosion on the exact frame the musical drop lands.
Behind that four-minute musical moment lies a meticulous, disciplined programming process.
In this lesson, we walk through the professional workflow of building timecoded lighting tracks from pre-production audio stems to final rehearsals, master surgical timestamp editing, and configure the console's Flywheel (Freewheel) engine to ensure the show continues running seamlessly even if a sync cable gets physically severed mid-song.
1. The Pre-Production Workflow: Audio Stems to Cue Grid
Professional timecode programming begins long before stepping into the arena:
[ Production Audio Stems ] ──> [ Musical Grid Analysis ] ──> [ Learn Mode / Placement ] ──> [ Surgical Snapping ]
(Embedded LTC Timecode)         (Transients, Drops, Hooks)   (Recording Key Hits)          (Frame-Accurate Edit)
1. Requesting Reference Stems
Always ask the tour's Musical Director (MD) or playback engineer for a reference audio bounce:
- Left Channel: Full stereo mixdown of the song.
- Right Channel: The exact SMPTE LTC audio timecode stripe (or accompanied by an embedded MTC audio file).
- Crucially, request the exact starting timestamp for each track (e.g. Song 3 starts at
03:00:00:00).
2. Identifying Structural Anchors
Before programming a single lighting fixture, listen to the reference track with headphones and mark the key musical landmarks:
- Structural Sections: Intro, Verse 1, Chorus 1, Breakdown, Riser, Drop, Outro.
- Rhythmic Transients: Kick drum downbeats (Beat 1 of every bar), snare rimshots (Beats 2 and 4), and rapid drum fills.
- Vocal & Lead Instrument Accents: The opening note of a guitar solo or the final soaring note of a vocal chorus.
2. Fast Recording vs. Surgical Timeline Placement
When programming timecoded cues, programmers use a two-pass workflow:
Pass 1: Real-Time "Learn Mode" Recording
- The console plays back the incoming timecode stream.
- The lighting programmer taps physical flash buttons, bumps, or macro keys on the console along with the music in real time.
- Every time a button is pressed, the console automatically creates a cue entry stamped with the exact current timecode frame (e.g.
03:01:24:14). - This captures natural human musicality and rhythmic feel across the song in four minutes flat.
Pass 2: Surgical Timestamp Grid Snapping
Because human fingers rarely hit a button with sub-millisecond precision, a manual tap might land at 03:01:24:14 when the musical kick drum transient actually occurred at 03:01:24:12 (two frames earlier).
- The programmer zooms into the timeline editor and snaps the cue timestamp to the exact musical grid marker.
- Moving that cue by two frames (\(80\,\text{milliseconds}\) at 25 fps) transforms a sloppy, slightly delayed flash into a razor-sharp, explosive hit.
3. Unilighter Timeline & Keyframe Widget Architecture
Inside Unilighter, time-locked animations and sequential cues are monitored through the Keyframe Animation Widget:
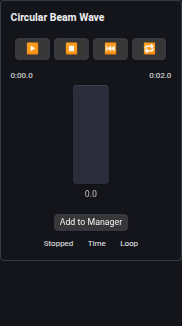
Timeline Capabilities:
- High-Precision Time Readout: Displays current elapsed playhead position alongside total track duration (
0:01.4 / 0:04.0) or musical bar subdivisions (Bar 2.1 / 4.0). - Beats Mode Snapping: When working in Beat Mode, keyframes snap directly to musical bar divisions (
1.0,1.25,1.5,2.0). If the master tempo changes, every cue scales proportionally without requiring manual reprogramming. - Sub-Track Speed Multipliers: Independent speed multipliers (
0.5x,1.0x,2.0x,4.0x) allow slow wash fades and double-time strobe chases to run concurrently within the same master cue.
4. The Flywheel (Freewheel) Engine: The Ultimate Touring Fail-Safe
During a live stadium concert, disaster can strike at Front of House:
- A camera operator trips over the analog timecode XLR cable, disconnecting it from the console.
- An audio patchbay cable fails backstage.
- The playback laptop's USB audio interface experiences an electrostatic discharge glitch.
Without Console Flywheel (Catastrophe):
[ LTC Audio Cable Disconnected ] ──> Console Timecode Halts ──> Immediate Stage Blackout!
                                                               (Band is playing, stage is dead!)

With Console Flywheel Engine (Rock-Solid Touring Reliability):
[ LTC Audio Cable Disconnected ] ──> Flywheel Clock Engages ──> Show Continues Playing Flawlessly!
                                     (Console self-generates)   (Audience notices nothing!)
How the Flywheel Works:
- Phase-Locked Internal Clock: While receiving valid incoming timecode, the console’s software engine synchronizes an internal virtual clock to the incoming frame ticks.
- Instant Dropout Detection: If incoming frames stop arriving unexpectedly, the console does not stop playback or kill DMX output.
- Internal Flywheel Takeover: The console immediately switches to internal clock generation, continuing to increment timecode frames forward at the exact last-known frame rate using its high-precision hardware crystal oscillator.
- Configurable Flywheel Duration: You can configure the flywheel timeout:
5 Seconds: Smooths over momentary cable wiggle or audio dropouts.Freewheel to End of Track: The console completes the current song automatically even if the incoming cable is never plugged back in.
- Soft Re-Lock: When the physical cable is reconnected, the console gently phase-aligns its clock without an abrupt visual jerk.
5. Virtual Rehearsals & Touring Discipline
Before the band arrives for soundcheck, professional lighting teams conduct Virtual Rehearsals:
- Stem Playback Test: Play the multi-track audio stems through the arena PA while running the timecode track.
- Stop/Start Stress Testing: Stop the timecode abruptly mid-verse, jump backward eight bars, and hit play:
- Verify that all moving heads execute clean Move-in-Black (MIB) and don't sweep beams awkwardly across the stage sets.
- Verify that color wheels and gobo flags preposition correctly before dimmers open.
- Emergency Manual Override Rehearsal: Ensure that the lighting operator can instantly take manual control (e.g. grabbing master wash faders or audience blinders) over the timecode track if the singer decides to talk to the crowd or extend an unscripted guitar solo.
6. Hands-On Lab: Programming a Timecode Hit and Testing Freewheel
Follow this exercise to program a frame-accurate cue and verify flywheel failover:
Step 1: Open Timeline Editor
- In Unilighter, open the Keyframe Editor (
/#/animations). - Create a new animation named
Chorus Drop Strike. - Set time mode to Seconds / Frames at
25 fps.
Step 2: Set the Target Hit Point
- Identify your song drop timestamp:
01:01:15:00(1 minute, 15 seconds, 0 frames). - Add a keyframe for
#blindersand#backline-spots:- At
01:01:14:24: SetDimmerto0%. - At
01:01:15:00: SetDimmerto100%, Color toWhite, and Shutter toOpen. - At
01:01:15:10: SetDimmerto40%, transitioning into a running step chase.
- At
Step 3: Configure Flywheel Settings
- In console settings, enable Timecode Freewheel / Flywheel Mode.
- Set the freewheel tolerance to
5.0 seconds.
Step 4: Test Failover
- Start timecode playback: watch the playhead advance smoothly toward
01:01:15:00. - Right at
01:01:12:00(three seconds before the drop), disconnect your timecode source. - Observe the console interface: the timecode status indicator changes to
FLYING(Freewheeling), the clock continues advancing steadily, and the blinder drop fires at01:01:15:00with absolute precision! - You have successfully implemented a touring-grade, fail-safe timecode production pipeline.
📝 Self-Assessment Quiz
Test your mastery of timecode programming workflows, surgical editing, and flywheel fail-safes:
- Scenario A: During an arena concert, a stage technician accidentally unplugs the master SMPTE LTC audio snake connecting the playback rack to the lighting console right in the middle of a complex, timecode-synchronized guitar solo. The lighting console continues playing cues, executing color changes, and hitting blinder drops seamlessly until the end of the song. What software mechanism made this possible?
- A) An active 120-ohm transmission line terminator plug connected across the DMX output.
- B) The console's Flywheel (Freewheel) engine, which detected the lost external signal and seamlessly continued advancing the timecode track using its internal high-precision crystal clock.
- C) An inverted binary DIP switch on Universe 1 that forced fixtures into sound-active standalone mode.
- D) A 3-phase harmonic transformer that boosted AC line frequency to compensate for missing audio data.
Correct Answer: B Why this is correct: A Flywheel (or Freewheel) engine is a critical fail-safe: when incoming timecode drops out, the console self-generates the clock at the last-known frame rate, ensuring that running cues execute without stopping or blacking out. Why other options are incorrect: Terminators (A) absorb electrical cable reflections; DIP switches (C) govern manual fixture addressing; and harmonic transformers (D) deal with electrical mains power, not software timecode clocks.
- Scenario B: A lighting designer is programming a rapid strobe hit on a heavy snare drum transient using real-time "Learn Mode." When reviewing the recorded cue, the designer notices the strobe fires slightly late—about 80 milliseconds after the drum hit. What is the correct post-recording procedure?
- A) Re-cable the entire stage with optical fiber to eliminate copper transmission latency.
- B) Open the timeline editor and surgically snap the cue timestamp two frames earlier to align exactly with the audio waveform's physical transient spike.
- C) Solder a 0.1 uF ceramic capacitor across the luminaire's dimmer circuit board.
- D) Lower the master console frame rate from 25 fps to 10 fps.
Correct Answer: B Why this is correct: Real-time human taps naturally incur human reflex delay (\(60–100\,\text{ms}\)). In professional post-editing, the programmer zooms into the timeline and shifts the cue back by 1–2 frames to align perfectly with the audio transient. Why other options are incorrect: Optical fiber (A) cannot fix human finger reflex delay; modifying circuit boards (C) is hazardous; and lowering the frame rate (D) makes timing resolution coarser, not finer.
- Scenario C: Why is "Virtual Rehearsal" (playing multi-track audio and timecode through the venue PA without the live musicians on stage) considered essential before opening night on a major tour?
- A) Because DMX512 standards prohibit transmitting universe data while human performers are physically breathing on stage.
- B) Because it allows the lighting and video crews to test cue hit accuracy, verify Move-in-Black prepositioning, and stress-test stop/start jumps across the entire show file without fatiguing the band.
- C) Because moving head stepper motors must be run for three hours without human presence to burn off manufacturing oils.
- D) Because venue insurance policies require automated lighting tracks to be verified by city electrical inspectors.
Correct Answer: B Why this is correct: Virtual rehearsals allow technical departments to test cue timings, transitions, and system limits thoroughly without taking up the artists' limited rehearsal time and physical stamina. Why other options are incorrect: DMX functions regardless of performer presence (A); modern fixtures do not require automated oil burn-offs (C); and electrical inspectors inspect physical wiring, not lighting cue aesthetics (D).