Lesson 1.5: Addressing & Binary DIP Switches
When you send a command from Unilighter telling a light to turn blue, how does that specific fixture know the command was meant for it, rather than the strobe light mounted right next to it?
Because DMX512 streams all 512 channels continuously down a single wire, every fixture on the line receives every single channel value.
To tell a fixture which chunk of data belongs to it, you assign it a unique Start Address.
This lesson explains how fixture footprints map into the 512-channel universe, how to navigate digital display menus, how DIP switches work, and how Unilighter eliminates manual binary math.
1. Footprints & The 512-Channel Universe Matrix
A DMX universe consists of exactly 512 consecutive channel slots (numbered 1 through 512).
Every luminaire requires a specific number of channels to control its functions (such as Dimmer, Color, Strobe, Pan, and Tilt). The number of channels a fixture occupies is called its Channel Footprint.
A fixture's Start Address is the first channel slot it claims in the universe:
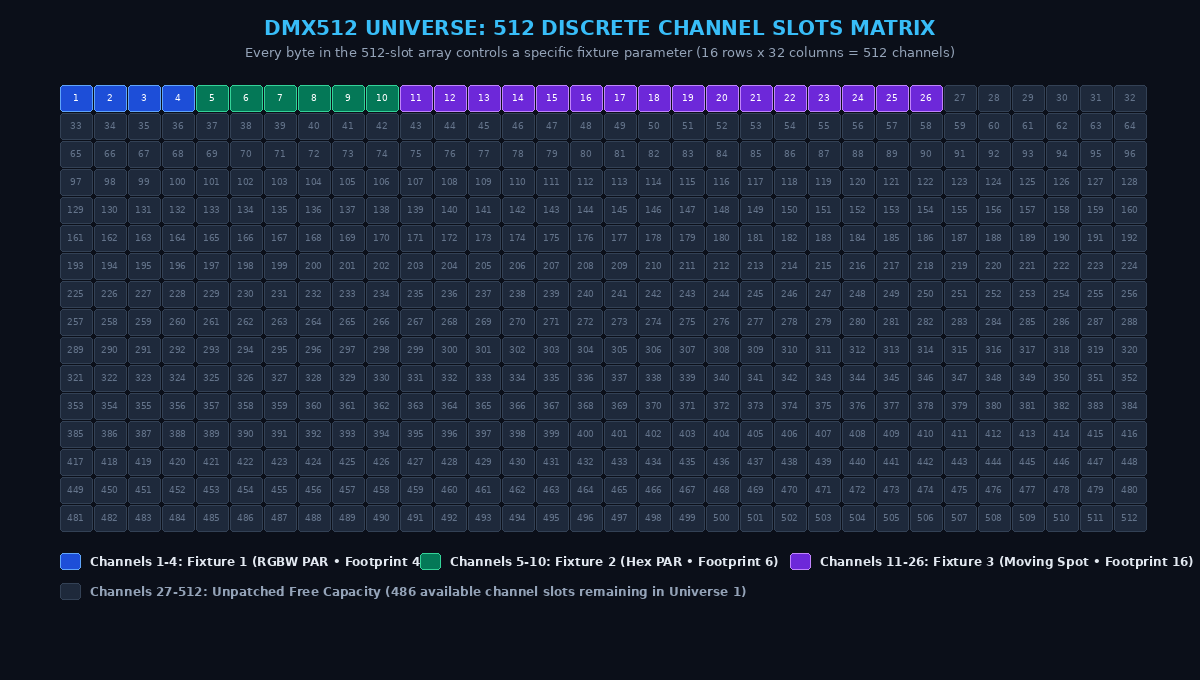
In the matrix above:
- Channels 1 – 4 (Blue): Claimed by Fixture 1 (a 4-channel RGBW PAR).
- Channels 5 – 10 (Green): Claimed by Fixture 2 (a 6-channel Hex PAR).
- Channels 11 – 26 (Purple): Claimed by Fixture 3 (a 16-channel Moving Spot).
- Channels 27 – 512 (Dark Slate): Free, unpatched capacity ready for additional fixtures.
\($\text{Next Start Address} = \text{Current Start Address} + \text{Current Footprint}\)$
Preventing Channel Overlaps
If you accidentally set Fixture 2 to Start Address 3, channels 3 and 4 will overlap! When you raise Blue on Fixture 1, Fixture 2 will unexpectedly turn on its Red emitter or trigger its strobe.
Intentional Cloning: If you have two identical front wash PARs and want them to always execute the exact same color and intensity together, you can deliberately assign both of them to Start Address 1. They will mirror each other perfectly while saving channels in your universe.
2. Setting Addresses via Digital Menus
Modern stage luminaires feature a digital display on their rear panel with four navigation buttons: MENU (or MODE), UP, DOWN, and ENTER:
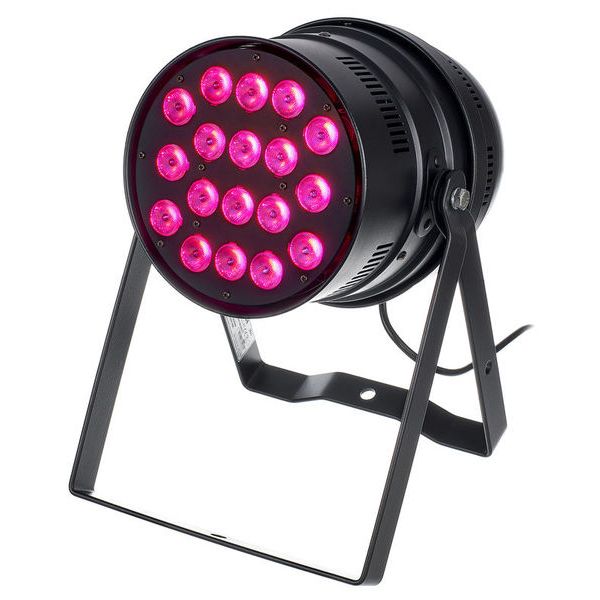
Standard Configuration Procedure:
- Press
MENU(orMODE) until the display shows the addressing screen (typicallyAddr,d001, orA001).- The prefix
dorAindicates standard DMX mode.
- The prefix
- Use
UPandDOWNto dial in your calculated start address (e.g.011). - Press
ENTERto save. The screen will blink or lock to confirm the address is stored in the fixture's internal memory.
3. Binary DIP Switches: Understanding the Math
Older, architectural, or budget lights often lack digital screens. Instead, their rear panel features a block of 9 or 10 tiny plastic slider switches called DIP switches (Dual In-line Package):

Each switch (1 through 9) represents a binary power of 2:
| Switch | 1 | 2 | 3 | 4 | 5 | 6 | 7 | 8 | 9 |
|---|---|---|---|---|---|---|---|---|---|
| Value | 1 | 2 | 4 | 8 | 16 | 32 | 64 | 128 | 256 |
The fixture's start address is the sum of all switches flipped to the ON position:
- Address 1: Switch 1
ON(\(1\)). - Address 5: Switches 1 and 3
ON(\(1 + 4 = 5\)). - Address 25: Switches 1, 4, and 5
ON(\(1 + 8 + 16 = 25\)).
What Does Switch 10 Do?
On nearly all 10-position DIP fixtures, Switch 10 is the Mode Selector:
- Switch 10 = OFF: Standard DMX Control Mode.
- Switch 10 = ON: Standalone / Auto-Sound Mode (switches 1–9 pick internal demo patterns instead of DMX channels). Always keep Switch 10 OFF when controlling lights from Unilighter!
4. How Unilighter Automates DIP Switches & Addressing
While understanding binary arithmetic (\(2^n\)) is a valuable skill for stage technicians, you never need to do mental math on a dark stage with Unilighter:
- Open the Device Patch screen in Unilighter.
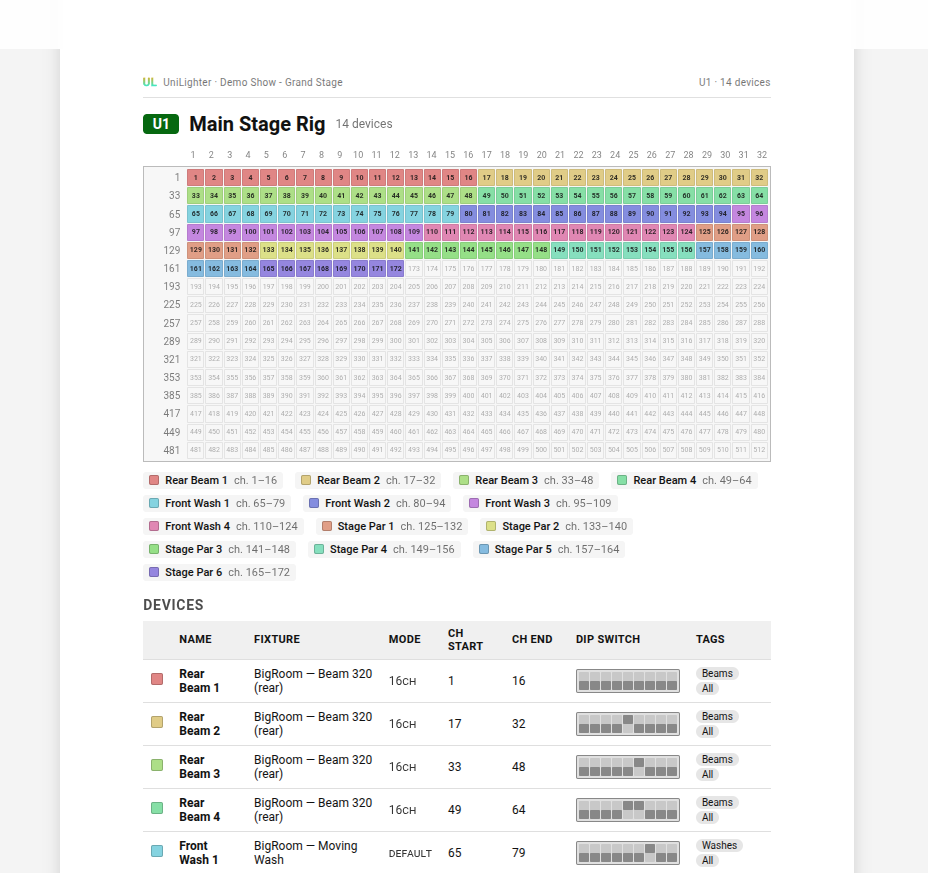
- When you patch a fixture and assign its start address, Unilighter automatically renders a visual DIP switch diagram showing the exact switches to flip up and down.
- You can also open the Print Patch Sheet tool to generate a printable PDF or mobile cheat sheet for your stagehands, complete with visual DIP switch drawings for every fixture hanging on the truss:
Remote Device Management (RDM): Zero Ladders Needed
If your fixtures support RDM (ANSI E1.20), you do not even need to touch the physical fixture. In Unilighter, click Discover RDM Devices. Unilighter scans the cable line, detects connected lights, and allows you to change their start addresses and operating modes directly from your laptop screen!
📝 Self-Assessment Quiz
Think through these practical scenarios:
-
Scenario A: You have four 7-channel LED PARs. You address the first one to Start Address 1. What should the start addresses be for the second, third, and fourth fixtures so that their channels do not overlap?
-
Scenario B: You find an older uplight with 10 DIP switches on the back. You want to set it to DMX Start Address 35. Which switches should be flipped to the
ONposition? What should Switch 10 be set to? -
Scenario C: Two moving heads on your rig are both set to Start Address 50. When you move the pan fader on channel 50, both heads turn to the left in sync. Is this a hardware glitch, and when might a lighting designer intentionally configure fixtures this way?