The Scenes screen is where lighting designers build, capture, and organize static lighting states, atmospheric color moods, and selective parameter presets.
Unlike dynamic animations or audio-reactive node graphs, a Scene represents a stable, reproducible visual picture on stage. Whether you need a warm acoustic ballad wash, a high-contrast theatrical spotlight on a lead singer, or a blackout, scenes serve as the foundational building blocks of your show.
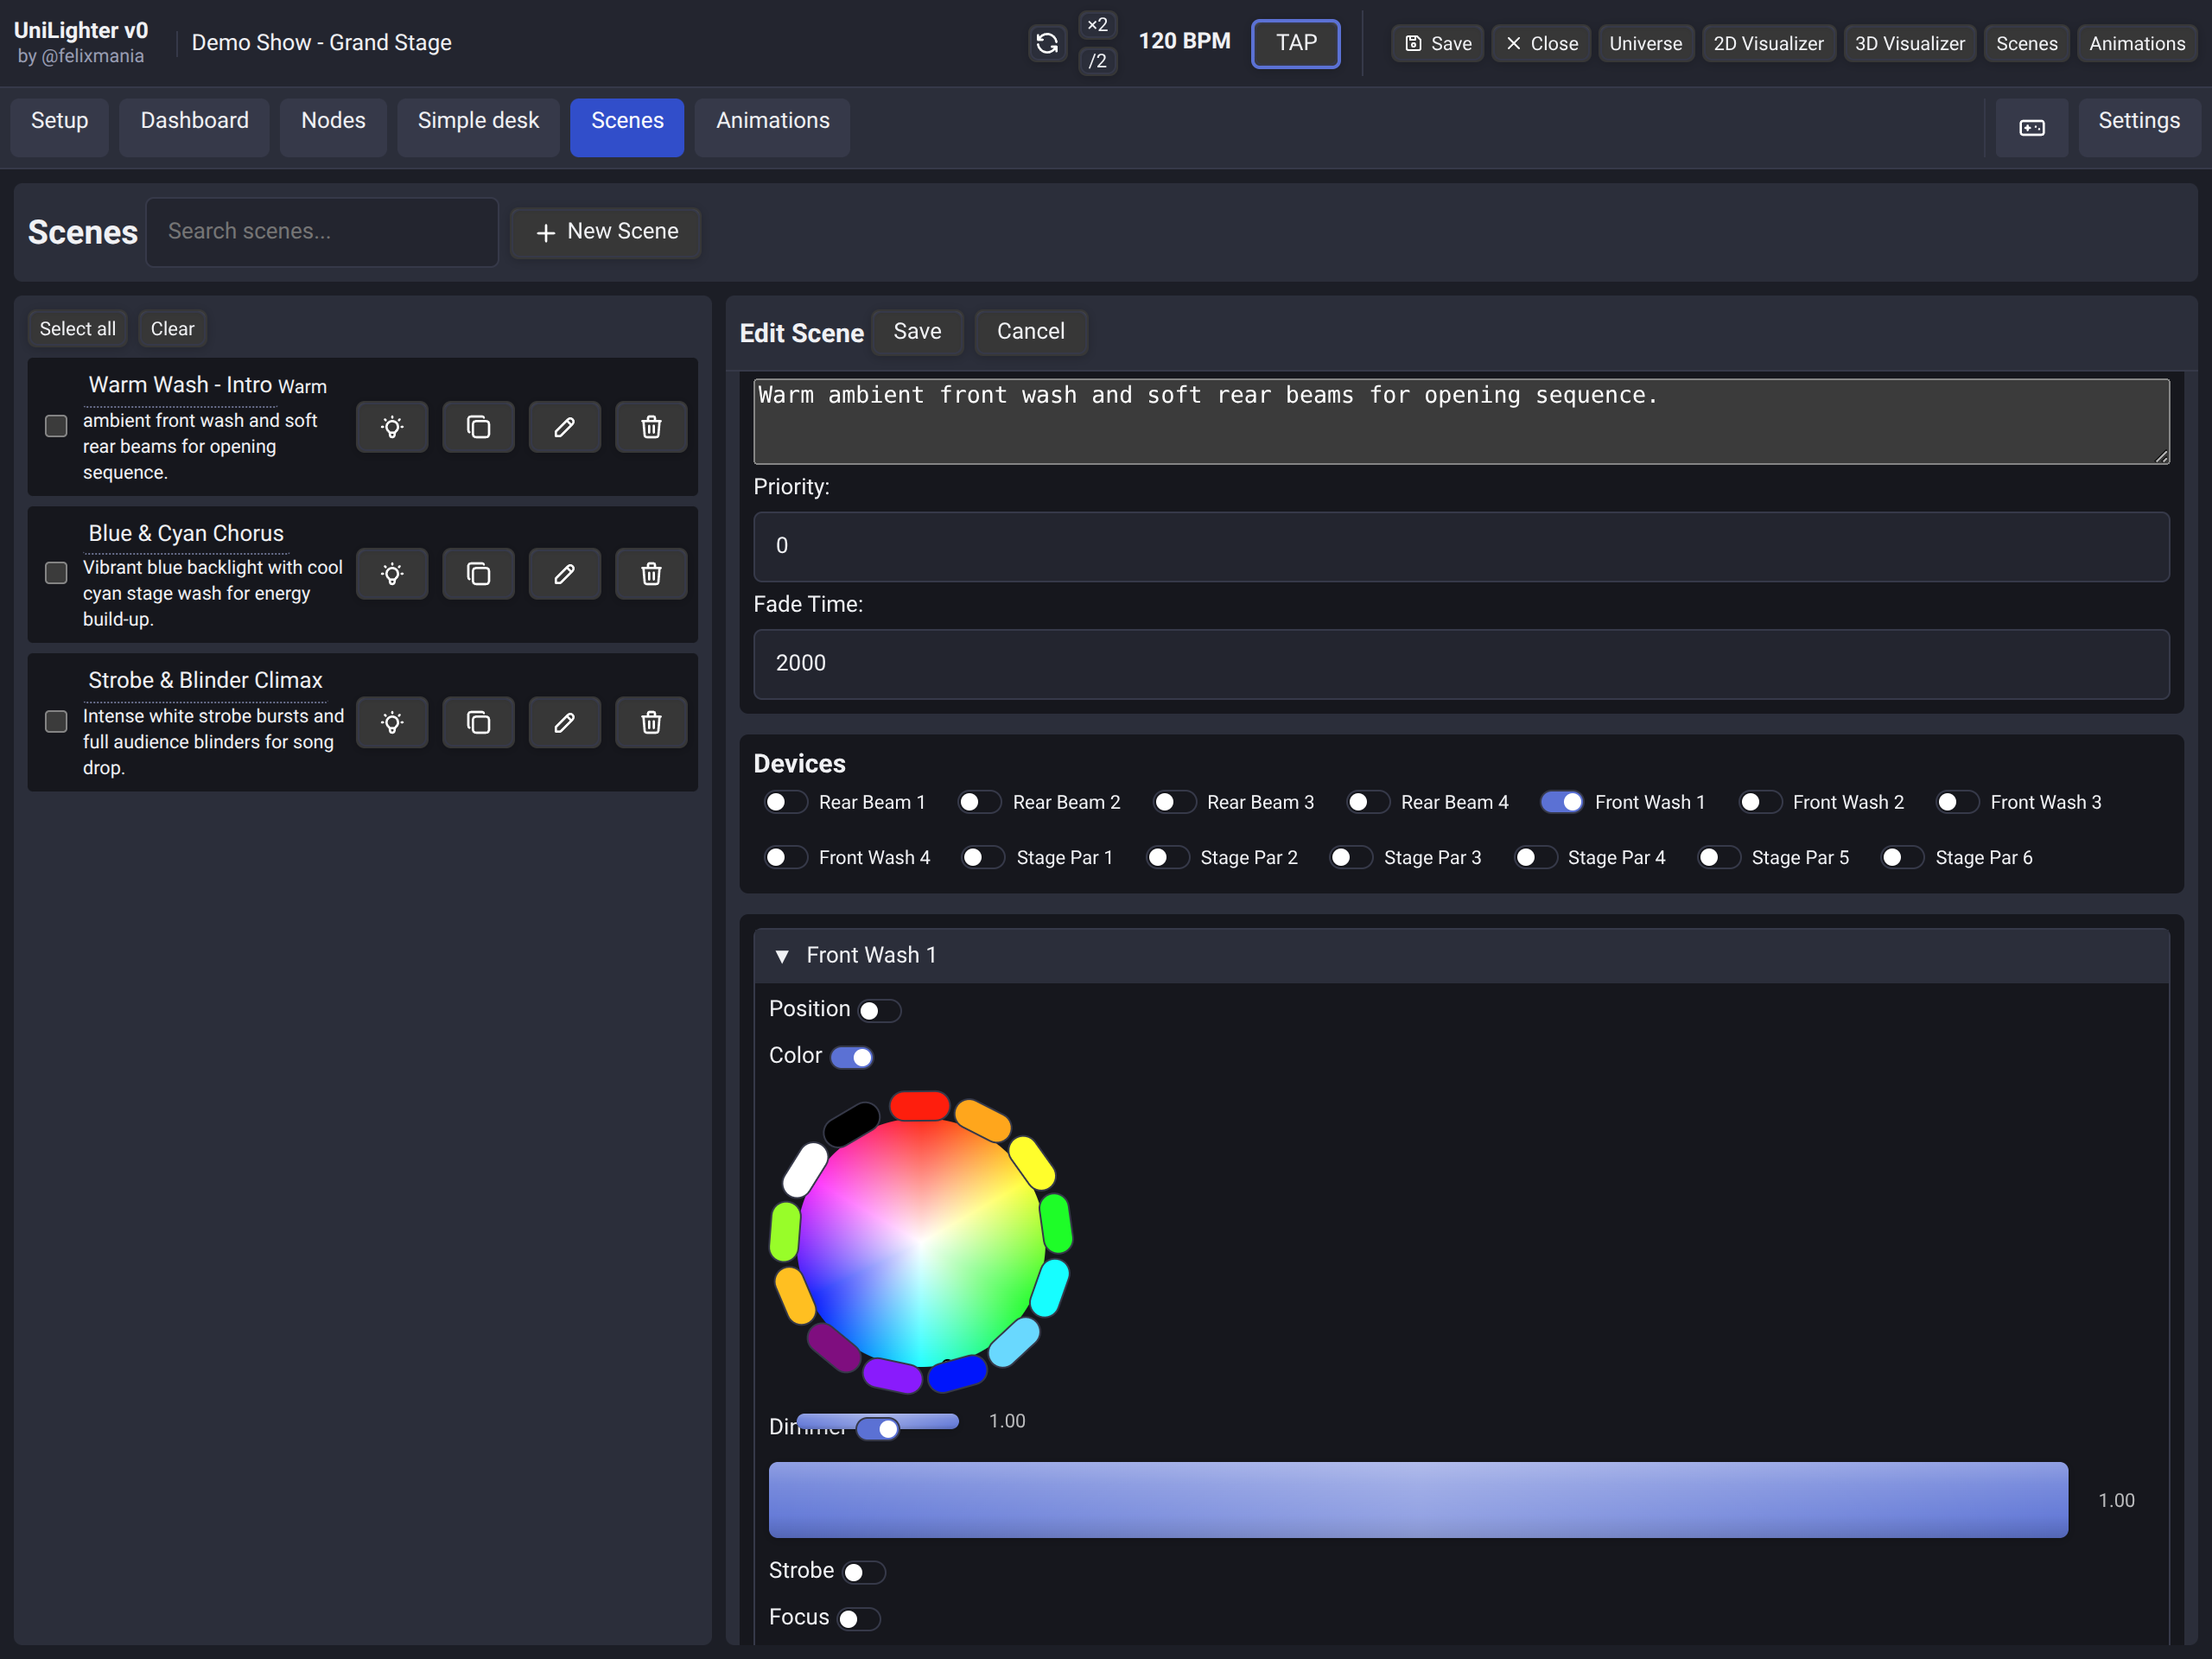
🎨 Scene Anatomy & Selective Parameter Capture
A common pitfall of early lighting consoles was "all-or-nothing" recording: storing a cue recorded every single DMX channel, forcing operators to fight unwanted pan/tilt resets when they only wanted to change colors.
In Unilighter, scenes support selective parameter capture:
1. Full Rig Looks
Captures the complete physical state of all patched fixtures:
- Dimmer & Strobe: Master intensities and flash rates.
- Color: Perceptual HSV coordinates and motorized gel wheel slots.
- Position: Pan, Tilt, and fine coordinates.
- Beam Optics: Zoom, Focus, Frost filter, Gobo wheels, and Prism rotation.
2. Selective Presets & Palettes
You can record scenes that only govern specific parameter groups:
- Color Palettes (e.g. Mood Deep Blue, Sunset Amber): Stores only color attributes. Firing this scene transforms the entire stage's color palette without altering moving head positions or turning off dimmers.
- Position Focus Presets (e.g. Drum Solo Focus, Vocalist Center Stage): Stores only Pan and Tilt coordinates.
- Beam FX Presets (e.g. Breakup Gobo + Prism): Stores optical parameters while leaving color and intensity under live fader control.
🧩 Rapid Parameter Selection
The New Scene selector remembers the parameter types you chose most recently. After selecting a fixture or tag, click another fixture or tag to inherit matching parameters that are available on the new target. This makes it quick to build a selective scene across a mixed rig without reopening the same parameter list for every fixture.
- Hold Shift, Ctrl, or ⌘ while selecting a fixture or tag to select all available parameters instead of inheriting the previous selection.
- Hold Alt to select a fixture or tag without inheriting the previous parameter set, then choose parameters manually.
- Refine the result with the individual parameter toggles. Snapshot All selects every available parameter for every fixture, while Deselect All clears the scene selection.
⏱️ Crossfade Timing & Transition Curves
Every scene features independent transition timing:
- Fade Time (ms): The duration over which parameters glide from their current live values to the scene's stored targets. A slow theatrical evening fade can be set to
5000ms, while a lightning strike or dramatic blackout can be set to0ms(instant snap). - Split Fade (In / Out): In theatrical stacks, incoming fixtures can fade up on a different timebase than outgoing fixtures fading down.
- Priority Assignment: Scenes default to normal playback priority (
0). Setting higher priorities ensures critical override scenes take precedence over background animation chases. Read more in the Control Priorities & Layering Guide.
🌈 Unified Color Science & Calibration
Unilighter features a unified, perceptual color engine that translates HSV coordinates into optimal physical diode outputs across RGB, RGBW, and motorized gel wheels.
For in-depth mathematical RGBW strategies (blend, combined, desaturate, saturation), diode hardware calibration multipliers, and white balance matching across mismatched LED batches, see the dedicated Color Engine: Science, RGBW Strategies & Calibration Guide.
🚀 Live Triggering & Playback Integration
Saved scenes integrate seamlessly into every operational surface of the console:
- Direct Triggering: Launch looks directly from the Scenes Manager with visual active indicators.
- Live Dashboard: Place scenes on color-coded buttons inside a Function Widget.
- Theatrical Screenplays: Embed scenes as clickable cue tags inside actor dialogue using Theater Cue Lists & Scenario Script Mode.
- Physical Hardware: Bind scenes to velocity-sensitive MIDI drum pads or keyboard hotkeys via Assign Mode.
Read more in the Console Interface & Screen Reference and the UI Controls Overview.